How-To: GemVue Handheld Polariscope
Published: August 2011
A polariscope is one of a series of tools that facilitates the process of gemstone and mineral identification. It is used in conjunction with other gemological tools to narrow the range of possibilities. The primary purpose of a polariscope is the determination of optic character. Gemstones (and minerals) commonly exhibit different structural forms. Some may be singly refractive, doubly refractive, or an aggregate of numerous microscopically small crystals. Each of these structures responds differently when viewed through a polariscope. This difference is referred to as the optic character.
A handheld polariscope is lightweight, durable, and can be used at home, in the office, or on the road in your search of quality gemstones.
Download printable PDF instructions here
The Science Behind Your GemVue™ Polariscope

Each polariscope contains two polarizing filters. The topmost is called an analyzer, and the lower a polarizer. The analyzer has a reeded edge similar to that found on a coin. It may be rotated to the left or right. The polarizer, or lower filter, is stationary and can be found at the opposite end of the polariscope frame.
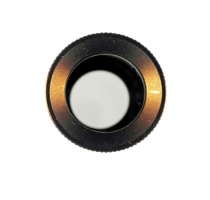
For convenience of use, a smaller circular module with a glass bottom, called the gem stage, is provided. The gem stage serves as a holder for any gemstone being tested. The narrower portion of the gem stage slides into the base of the polariscope frame and is positioned above the polarizer. The gem stage can be easily rotated left or right with your free hand.
If the analyzer (top filter) is aligned properly with the polarizer (bottom filter), it can totally block or permit the passage of light. When both filters are in the dark position (no light visible), it is referred to as crossed polars. When rotated 360°, the filters will go light and dark two times. Rotating the analyzer 180° brings it back to its original dark or light position.
Using Your Polariscope
Step one: Take your sample (gemstone or mineral), clean it with a cloth, and place it in the gem stage. Using tweezers will facilitate the placement of your sample. Set the gem stage aside for the moment.
Step two: Attach the polariscope frame to the light source. The bottom of the frame contains a tightening screw that secures the unit to the included light source. Once secure, grasp the base of the light source and hold the full unit vertically. The light source can be activated by simultaneously holding the crosshatched grip and the top of the light source while rotating the grip clockwise (or the head of the light counter-clockwise).
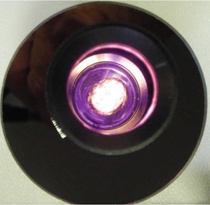
Step three: While still in the vertical position, look down through the analyzer and view the light source. Turn the analyzer (top filter) left and right. You will notice that the light becomes brighter or darker, depending on the initial position of the filters. Turn the analyzer to the dark position (crossed polars).
Step four: Gently place the gem stage over the polarizing filter. Rotate the gem stage 360° and observe the response. There are four possibilities.
1) The sample appears light through the entire rotation. It is an aggregate (AGG).
2) The sample appears dark throughout the entire rotation. It is singly refractive (SR)
3) The sample blinks light and dark. The sample may be doubly refractive (DR) or SR ADR.
4) The sample may exhibit irregular blinking that appears as snake-like bands or crosshatching. The stone is probably SR with anomalous double refraction (ADR), but may be doubly refractive.
The first two responses require no further tests. Responses 3 and 4 require a confirmation test to determine the true optic character of the sample.
Confirmation test
Step one: Make sure the polariscope is in the dark position. If you have removed the gem stage, place it back in the polariscope frame.
Step two: Turn the gem stage until the stone appears be at its lightest point. Be sure the filters remain in the dark position.
Step three: Quickly rotate the analyzer to the light position. The gem stage remains stationary. Observe the lightest area of the stone and see if there is any change. There are two possibilities:
1) The sample looks noticeably lighter it is singly refractive (SR)
2) The sample looks the same or slightly darker it is doubly refractive (DR)